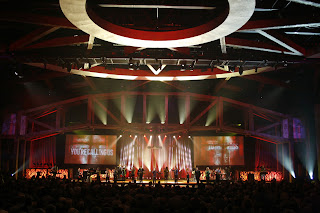
As you can probably see from the pictures above, we used a lot of set pieces and drape.
One of our larger elements was some scenic boxes we built. Below is a picture of the finished product.

Each of our scenic panels was made of 3 2x4s, 1 sheet of black Coroplast, 1 sheet of white Coroplast, and 3 1x4s for trim. We built our scenic frames by making 2"x4" frames that measured 4'x8. We painted the boards black first then assembled the frames with drywall screws (see below). You can also see Mike and James helping with the painting craziness. :)
Above are the finished frames. We attached our cut black coroplast to these frames. We cut the black coroplast into 1.5 - 2.5 inch strips. You can see some of the attached strips below.
We attached strips in criss crossing patterns. First on the top then on the bottom like below.
I think the opposing strips give some awesome depth. Once we were at this point we added a full sheet of white Coroplast on the back, like below. We used 12mm Staples to attach the coroplast and razors to trim off the excess material.

Above is one of the frames finished (except for the trim). We nearly left them without the trim. They look nice and pretty clean even without trim. For the trim, we cut 1x4's at a 45 degree angle and painted them with a Oak stain. Unfortunately I don't have any nice close ups, however you can catch the idea from the picture at the top.
We lit the scenic panels with 3 cell strip lights from the back and Colorblasts from the front on an angle.
We lit the scenic panels with 3 cell strip lights from the back and Colorblasts from the front on an angle.
Here is a link to order Coroplast if you are trying this. You can also pick it up at a local sign shop, for cheaper. Everything else can be picked up at a local hardware store.
We also rented some Molten Lava fabric from Dazian Fabrics. Below is a close up picture of it. It takes light amazingly, especially when lit from multiple angles.
We rented some Colorblaze 72's to light the bottom of the fabric, and side lit the fabric with 10 of our Colorblast 12s. Below are a few of the wonderful looks George made.
We also did environmental projection this year. We setup 4 DL-3s at FOH and projected on the walls that surround the sanctuary. The main purpose however for these projectors was to project a scripture we had on the Kabuki in front of the stage for the opening. Below are some pictures.
For Easter this year, we opened with a video telling of Mary coming to find the tomb empty. We hung 10'w x 34'h White fabric from 6 kabuki selenoids. After the video finished we drop the fabric in black. It revealed our Easter set.
Below are some more pictures from Easter. Hope this helps you in your desire to serve the lord.


