
We used a set built by Christ's Church of the Valley in Peoria AZ as our jumping off point. Brad and his team did a great job and were really helpful. CCV Set
Due to the scale of this build, we spread this set build out over 6 weeks. Our first week was pallet acquisition, the next 2 were pallet deconstruction, the next week was framing, the next was covering our pieces with the pallets, and lastly we transported, hung, and lit the scenic pieces.

We used 70 2x4s, 20 sheets of 7/8" OSB, 140 pallets, 50' of Aluminum window screening, and over 15,000 screws, nails, and brads. Amazingly our set portion of the budget was only about $1000. We built the set in parts, 2 main wall sections (20' x 11'), 5 smaller panels (4'x8'), 2 small panels (2'x 4', and 6 deck surrounds (3- 1'x 8', 3- 2'x8')


Easily the most time consuming part of the task was to disassemble the pallets. We collected and dis-assembled 130 pallets. Over 5000 nails got pulled in the process of dis-assembly. Although most nails pulled through the planks when removing them, we did learn near the end that bending the nails does work most of the time.

We found very quickly that pulling planks off then puling nails was going to take forever. So we resorted to cutting off the 2 sides of the pallets. We lost about 4 inches per side but only had to pull a third of the amount of nails. Way worth it!


Warren, Tonya, and TJ put a ton of time into the pallet frenzy. They really made this awesome set possible.

Next, we built the frame. We are lucky enough to have Rodney on our team, who is a pro builder. He did a great job making sure to build the frame square and symmetrical, which made life easy during the whole build. That and he almost always sports an awesome cowboy hat!


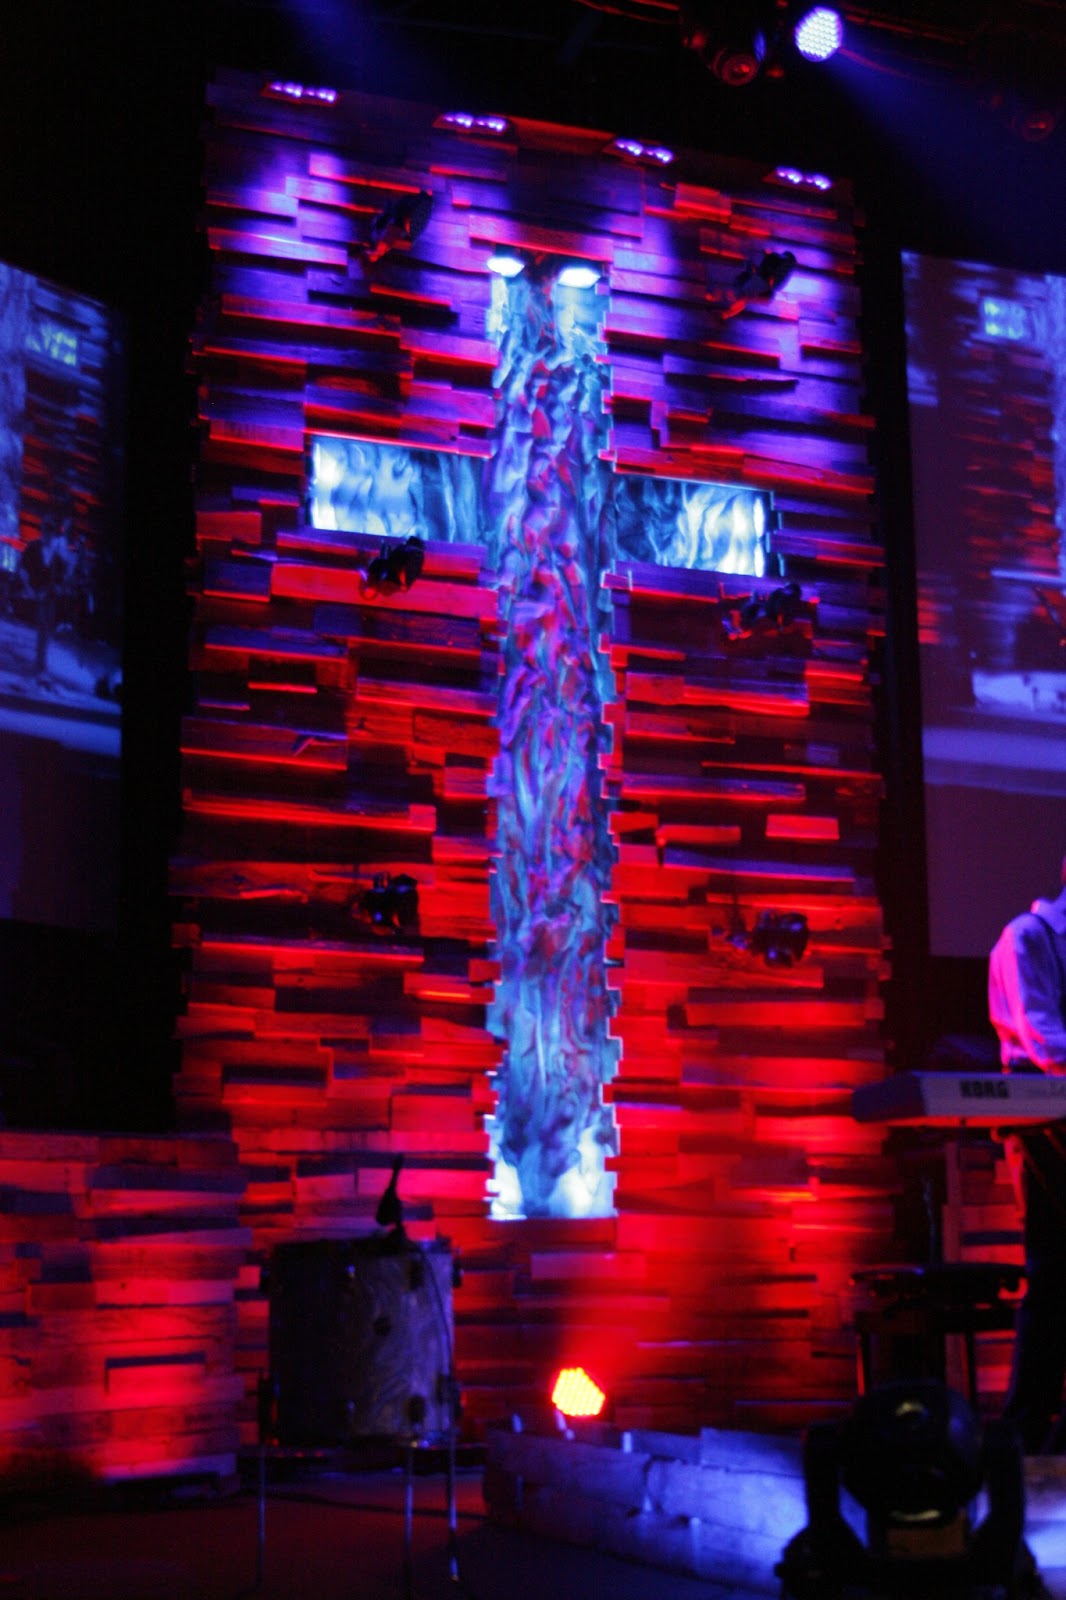
We built the outer frame to our desired dimensions first, then built the cross to our desired dimensions inside of that, then lastly added the needed bracing and studs. Once framed, we built the second large panel directly on top of the first, using it as our guide. We attached OSB to the frame using screw guns, so that we would have a nailing surface for the planks.


We also had the fore thought to paint the edges of our scenic black. This allowed us to miss a small section or have a gap near the end without it being noticeable to the congregation.

We found that once decked these behemoths, were crazy heavy.

Rodney and I lifted the one above alone, we only made that mistake once :)

Planking (not the awkward photo pose) was probably the best part of the build. I mean seriously, you get to shoot things with a gun of nails. Its pretty fun stuff.


The process we used to get the depth, color variation, and absolute awesomeness that our set possessed was as follows: First lay down a base layer. We used full pieces that varied in size shape in color, we tried to make sure few similar pieces touched. At this point, we didn't worry about filling any gaps. This layer went fastest. Because we didn't have to cut anything, we just grabbed pieces and nailed. On the large pieces, we chalked lines every 2 foot to ensure consistency . We used these lines to adjust and stay level as we went up.

In our next layer we overlapped over our gaps we had left in the first. We also cut to size the pieces we needed to fill the ends, large gaps, and anything we didn't cover with the first planks.

Lastly, we added a few planks to vary the dimension and give it some uniqueness through out the set.
We found some of the coolest looking pallets ended up being the ones we got from construction sites. Most of them had Oklahoma red mud on them and gave some nice color. As you can see below, they really stick out and give it an interesting flavor (tasting is not advised).


Another thing we did to add some additional visual interest was to mount some mac 101s on the front of the scenic. I didn't want to block much of the light that was washing the surface of the boards though so we did this...

We made custom fixture mounts out of gas pipe, M8 screws, and some textured spray paint.


The hope was to make the stand offs look rustic, kinda like rusty pipes. The 101s added a nice lower layer of lighting that I could use for scenic light, back light, and aerials.


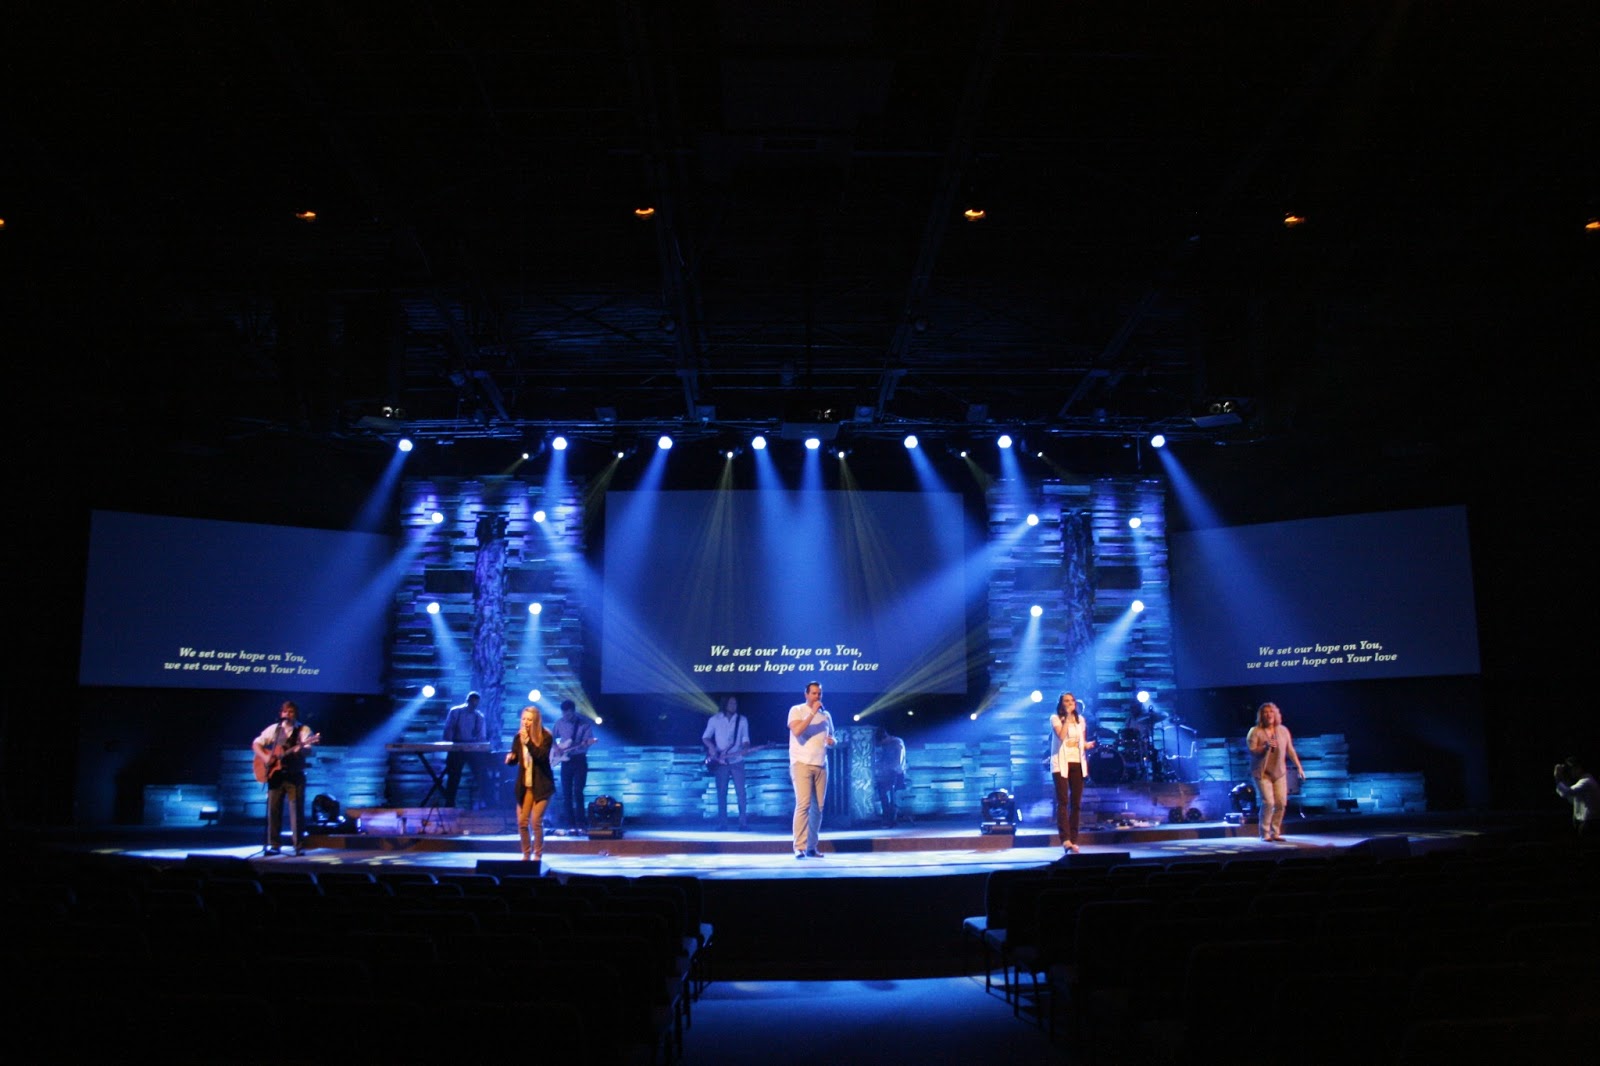
Apart from the large crosses, we built 5- 4'x8' flats to full under our screens.

We also built some risers for the keys and drums, complete with facings made from the pallet wood. See the bottom of the next picture. It gave a nice depth to the stage.

The most challenging of the parts for this set (moving it and hanging it) all happened on one day.
The first was transporting the massive 20' x 11' set pieces from our offsite set garage to the Auditorium. Simply moving the set pieces was a feat. Once finished they weighed over 600 lbs a piece. We used furniture dollies and brute force to get them around. Lifting was in the form of a 2 step process involving 4 people.
To move the frames from our workshop to we used a 16' trailer and an idea that we will never repeat.

As you can see, we put the frame up on pallets at one end and backed the trailer under it. Once the trailer could go no further (hit the scenic at the back), we lifted the back end of the scenic and continued the trailer backing craziness. Not one of my finer leadership moments, but you never learn without making a few mistakes. We are just lucky Kendall is an awesome driver!
Once at our campus, we had fun getting them in the door. The clearance from our backstage wall to the exterior wall behind the stage opening is 11' 6" This made our 11' 4"-ish scenic piece a tight fit.
Once at our campus, we had fun getting them in the door. The clearance from our backstage wall to the exterior wall behind the stage opening is 11' 6" This made our 11' 4"-ish scenic piece a tight fit.

Our other significantly difficult task was to hang them. Once in the room and onstage, we lifted the crosses one at a time with 2- 1/2 ton chain motors per side. Although we were more than under the limits on all our rigging and building of the scenic, it was still a little never racking to see it go up.


For the 4' x 8' sections, we bungied the flats to upside-down road cases. For the wide center section we made some small legs that were weighted on the back too.
One of the simpler, yet impactful elements to our design was a piano shell covered in chalk graffiti for our opening songs. We ended up getting two pianos for free from craigslist. Billy, Kendall, and myself gutted one of them and they painted it with black chalkboard paint.


A few days later Colin (our awesome print graphics guy) came and chalked it into a piece of art.

The piano acted as a really nice feature point on the stage. Two extra colorblasts made it shine!

For the most part we used fixtures we already had. We rented 20 Colorblast for Easter weekend, but found that our normal 16 that we own lit the set ok by themselves. As a true lighting guy, I thought it NEEDED the 20, but few people noticed when I had to return them.
We came in over $600 under budget, which in my experience is a pretty rare thing for lighting. We loved this set and ended up using it for a bit more than 2 months. We took it down a few days ago, and are planning to re-purpose it as a set in our student theater.
Below are a few more pictures. As always, feel free to shoot me an e-mail. I would love to help others in any way I can. Feel free to email me at stevenhallav @ gmail.com


My son was a big help in building this too, as you can see!